> ## Documentation Index
> Fetch the complete documentation index at: https://developers.squads.so/llms.txt
> Use this file to discover all available pages before exploring further.
# Fuse Wallet
> Build a wallet with Smart Accounts for a delightful onboarding experience
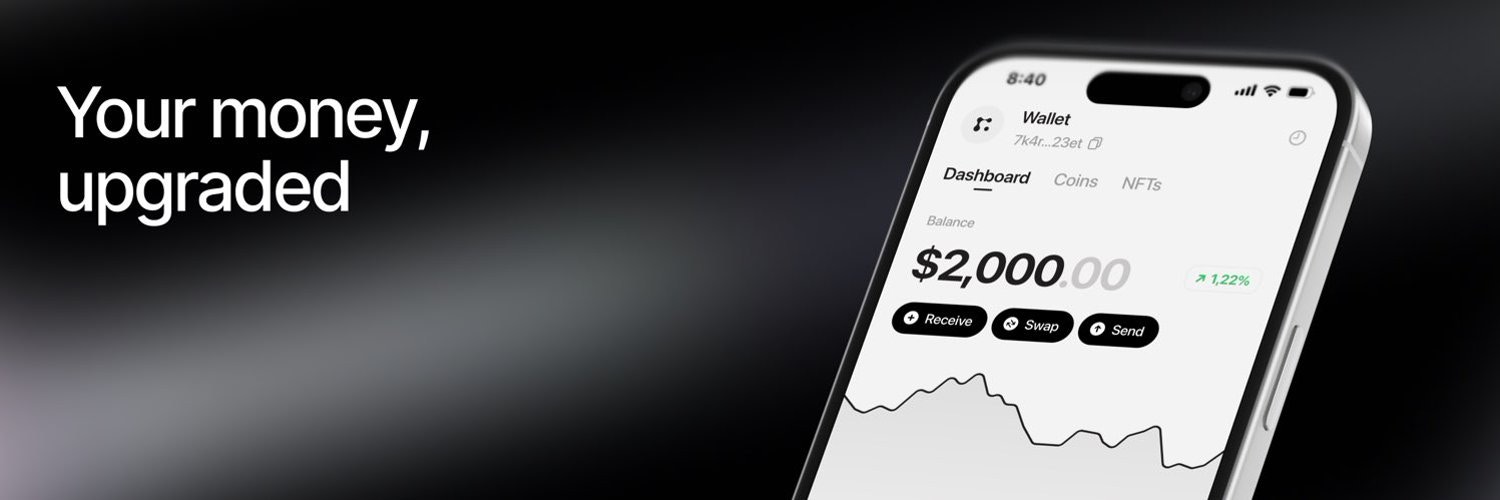 [Fuse wallet](https://fusewallet.com) is a great example of how smart accounts can be used to drastically improve UX without giving up security or adding additional counterparty risk.
## The Problem
* EOA wallets have a high barrier to entry
* Users need to store and protect secret recovery phrases
* Loose your wallet = lose your funds
## The Solution
* Smart Accounts with multiple signers removes the single point of failure of secret recovery prhases and increases security
* Smart Accounts add programmable capabilities to wallets to retain security but allow for more complex user flows
[Fuse wallet](https://fusewallet.com) is a great example of how smart accounts can be used to drastically improve UX without giving up security or adding additional counterparty risk.
## The Problem
* EOA wallets have a high barrier to entry
* Users need to store and protect secret recovery phrases
* Loose your wallet = lose your funds
## The Solution
* Smart Accounts with multiple signers removes the single point of failure of secret recovery prhases and increases security
* Smart Accounts add programmable capabilities to wallets to retain security but allow for more complex user flows
 ## The Implementation
### Onboarding
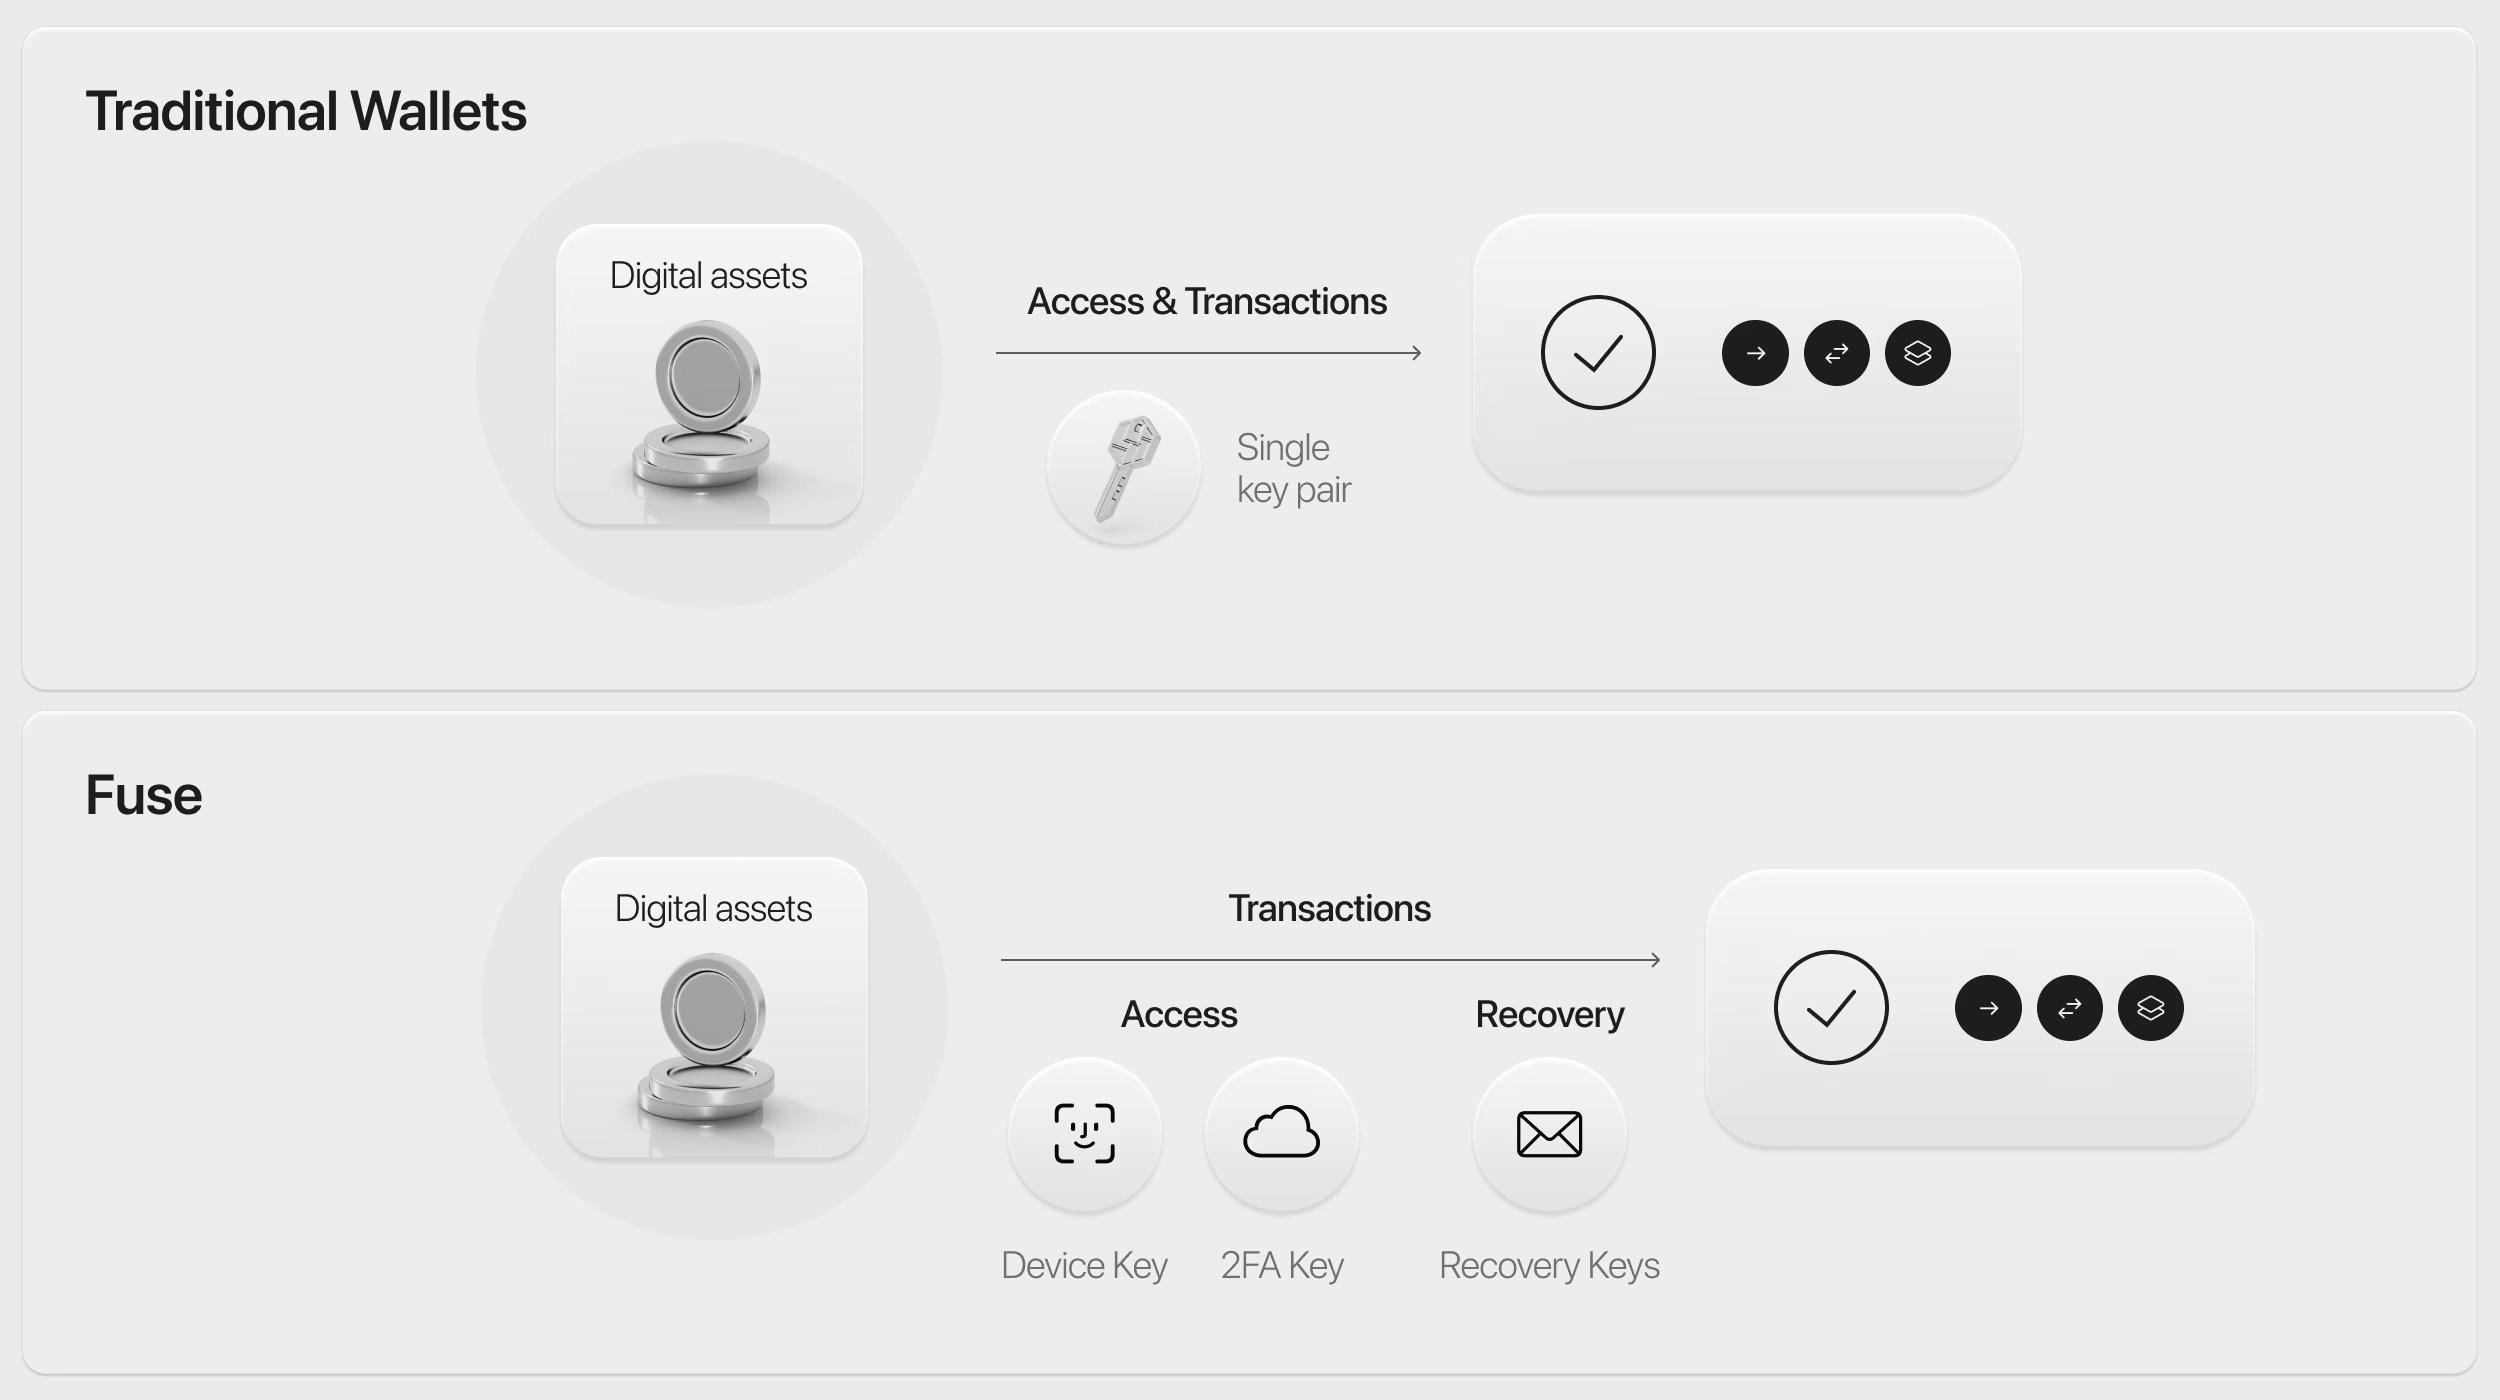
In order to remove the barrrier to entry, Fuse creates multiple keys on setup thus removing the reliance on a secret recovery phrase. By setting the threshold to 2, Fuse ensures that the user can always access their funds even if the device is lost.
#### Signer Setup
1. On-device key
2. iCloud backup key
3. Recovery MPC key
#### Security Considerations
* The threshold of 2 ensures that no single signer can compromise the wallet
* Users can recover their wallet using any combination of two signers
* The MPC recovery key adds an additional layer of security while maintaining user-friendly recovery options
## Implementation Guide
Here's how to implement a wallet similar to Fuse using Squads API v1 endpoints:
In this guide, we'll:
1. Create a Smart Account with initial signers (on-device and iCloud backup keys)
2. Add a recovery MPC key as a third signer for enhanced security
3. Verify the account setup and check balances
4. Create and submit a USDC transfer transaction
First, create a new Smart Account with the on-device key and iCloud backup key using the [create smart account](/squads-api/api-reference/v1/endpoint/smart-accounts/post) endpoint.
```bash theme={null}
curl -X POST https//developer-api.squads.so/v1/smart-accounts \
-H "Authorization: Bearer YOUR_API_KEY" \
-H "x-squads-network: mainnet" \
-H "Content-Type: application/json" \
-d '{
"smart_account_signers": [
{
"address": "ON_DEVICE_PUBLIC_KEY",
"permissions": ["CAN_INITIATE", "CAN_VOTE", "CAN_EXECUTE"]
},
{
"address": "ICLOUD_BACKUP_PUBLIC_KEY",
"permissions": ["CAN_VOTE"]
}
],
"threshold": 2
}'
```
The returned `smart_account_address` is your new wallet address. Save this for sending funds to the wallet.
Add the MPC recovery key as a third signer using the [update smart account](/squads-api/api-reference/v1/endpoint/smart-accounts/patch) endpoint. This provides an additional layer of security and recovery options.
```bash theme={null}
curl -X PATCH https//developer-api.squads.so/v1/smart-accounts/{smart_account_address} \
-H "Authorization: Bearer YOUR_API_KEY" \
-H "x-squads-network: mainnet" \
-H "Content-Type: application/json" \
-d '{
"smart_account_signers": [
{
"address": "ON_DEVICE_PUBLIC_KEY",
"permissions": ["CAN_INITIATE", "CAN_VOTE", "CAN_EXECUTE"]
},
{
"address": "ICLOUD_BACKUP_PUBLIC_KEY",
"permissions": ["CAN_VOTE"]
},
{
"address": "MPC_RECOVERY_PUBLIC_KEY",
"permissions": ["CAN_VOTE"]
}
],
"threshold": 2,
"transaction_signers": [
"ON_DEVICE_PUBLIC_KEY",
"ICLOUD_BACKUP_PUBLIC_KEY"
],
"fee_config": {
"currency": "usdc",
"payer_address": "YOUR_SMART_ACCOUNT_ADDRESS"
}
}'
```
Note that we:
* Keep the threshold at 2, meaning any two signers can approve transactions
* Include all existing signers in the update
* Add the new MPC recovery key with CAN\_VOTE permission to ensure that the user can always access their funds
* Include transaction\_signers for the update operation
* Configure the fee to be paid in USDC by the smart account
When submitting this update transaction, remember that:
* The transaction needs to be signed by the specified transaction\_signers
* Since we're using the smart account as the fee payer, no additional fee payer signature is needed
* If using an external fee payer, that account would need to sign the transaction
Learn more about [transaction fees](/squads-api/transaction-fees) and how they work.
Verify your Smart Account setup and check the balances using the GET /v1/smart-accounts/{smart_account_address} endpoint.
```bash theme={null}
curl -X GET https//developer-api.squads.so/v1/smart-accounts/{smart_account_address} \
-H "Authorization: Bearer YOUR_API_KEY" \
-H "x-squads-network: mainnet"
```
Now let's create and submit a USDC transfer transaction. We'll use the transaction endpoint to submit the transfer.
```javascript theme={null}
// Import required dependencies
import { Connection, PublicKey, Transaction } from '@solana/web3.js';
import { Token, TOKEN_PROGRAM_ID } from '@solana/spl-token';
// Initialize connection
const connection = new Connection('https//developer-api.mainnet-beta.solana.com');
// USDC mint address on mainnet
const USDC_MINT = new PublicKey('EPjFWdd5AufqSSqeM2qN1xzybapC8G4wEGGkZwyTDt1v');
const smartAccountAddress = new PublicKey('YOUR_SMART_ACCOUNT_ADDRESS');
const recipientAddress = new PublicKey('RECIPIENT_ADDRESS');
const amount = 100 * 1e6; // 100 USDC (6 decimals)
// Get the token accounts
const sourceTokenAccount = await Token.getAssociatedTokenAddress(
TOKEN_PROGRAM_ID,
USDC_MINT,
smartAccountAddress
);
const destinationTokenAccount = await Token.getAssociatedTokenAddress(
TOKEN_PROGRAM_ID,
USDC_MINT,
recipientAddress
);
// Create the transfer instruction
const transferInstruction = Token.createTransferInstruction(
TOKEN_PROGRAM_ID,
USDC_MINT,
sourceTokenAccount,
destinationTokenAccount,
smartAccountAddress,
[],
amount
);
// Create and serialize the transaction
const transaction = new Transaction().add(transferInstruction);
const serializedTransaction = transaction.serialize().toString('base64');
// Submit the transaction through our API
const response = await fetch(
`https//developer-api.squads.so/v1/smart-accounts/${smartAccountAddress}/transactions`,
{
method: 'POST',
headers: {
'Authorization': 'Bearer YOUR_API_KEY',
'x-squads-network': 'mainnet',
'Content-Type': 'application/json'
},
body: JSON.stringify({
transaction: serializedTransaction,
transaction_signers: [
'ON_DEVICE_PUBLIC_KEY',
'ICLOUD_BACKUP_PUBLIC_KEY'
],
fee_config: {
currency: 'usdc',
payer_address: smartAccountAddress.toString()
}
})
}
);
const data = await response.json();
// The response will contain the prepared transaction that needs to be signed
const { transaction: preparedTransaction } = data;
```
This example shows how to:
1. Create a USDC transfer instruction using `@solana/spl-token`
2. Build and serialize the transaction
3. Get gas abstraction for the transaction and prepare the transaction for submission using the [prepare transaction](/squads-api/api-reference/v1/endpoint/smart-accounts/transactions) endpoint
4. Handle the response which contains the prepared transaction
After receiving the prepared transaction from the API (which includes all necessary fee configurations), you just need to:
* Sign it with the required signers (matching the `transaction_signers` you specified)
* If using an external fee payer (not the smart account), sign with the fee payer
* Submit the signed transaction to the Solana network
* Monitor the transaction status until it's confirmed
Remember to:
* Handle errors appropriately
* Implement proper key management for signing
* Consider [adding spending limits](/squads-api/api-reference/v1/policies#spending-limits) for additional security
## Next Steps
Once your Smart Account is set up, you can:
* Implement transaction signing using the [transactions endpoint](/squads-api/api-reference/v1/endpoint/smart-accounts/transactions)
* Add spending limits using the [policies endpoints](/squads-api/api-reference/v1/policies)
* Monitor balances using the [get-balances endpoint](/squads-api/api-reference/v1/endpoint/smart-accounts/get-balances)
## The Implementation
### Onboarding
In order to remove the barrrier to entry, Fuse creates multiple keys on setup thus removing the reliance on a secret recovery phrase. By setting the threshold to 2, Fuse ensures that the user can always access their funds even if the device is lost.
#### Signer Setup
1. On-device key
2. iCloud backup key
3. Recovery MPC key
#### Security Considerations
* The threshold of 2 ensures that no single signer can compromise the wallet
* Users can recover their wallet using any combination of two signers
* The MPC recovery key adds an additional layer of security while maintaining user-friendly recovery options
## Implementation Guide
Here's how to implement a wallet similar to Fuse using Squads API v1 endpoints:
In this guide, we'll:
1. Create a Smart Account with initial signers (on-device and iCloud backup keys)
2. Add a recovery MPC key as a third signer for enhanced security
3. Verify the account setup and check balances
4. Create and submit a USDC transfer transaction
First, create a new Smart Account with the on-device key and iCloud backup key using the [create smart account](/squads-api/api-reference/v1/endpoint/smart-accounts/post) endpoint.
```bash theme={null}
curl -X POST https//developer-api.squads.so/v1/smart-accounts \
-H "Authorization: Bearer YOUR_API_KEY" \
-H "x-squads-network: mainnet" \
-H "Content-Type: application/json" \
-d '{
"smart_account_signers": [
{
"address": "ON_DEVICE_PUBLIC_KEY",
"permissions": ["CAN_INITIATE", "CAN_VOTE", "CAN_EXECUTE"]
},
{
"address": "ICLOUD_BACKUP_PUBLIC_KEY",
"permissions": ["CAN_VOTE"]
}
],
"threshold": 2
}'
```
The returned `smart_account_address` is your new wallet address. Save this for sending funds to the wallet.
Add the MPC recovery key as a third signer using the [update smart account](/squads-api/api-reference/v1/endpoint/smart-accounts/patch) endpoint. This provides an additional layer of security and recovery options.
```bash theme={null}
curl -X PATCH https//developer-api.squads.so/v1/smart-accounts/{smart_account_address} \
-H "Authorization: Bearer YOUR_API_KEY" \
-H "x-squads-network: mainnet" \
-H "Content-Type: application/json" \
-d '{
"smart_account_signers": [
{
"address": "ON_DEVICE_PUBLIC_KEY",
"permissions": ["CAN_INITIATE", "CAN_VOTE", "CAN_EXECUTE"]
},
{
"address": "ICLOUD_BACKUP_PUBLIC_KEY",
"permissions": ["CAN_VOTE"]
},
{
"address": "MPC_RECOVERY_PUBLIC_KEY",
"permissions": ["CAN_VOTE"]
}
],
"threshold": 2,
"transaction_signers": [
"ON_DEVICE_PUBLIC_KEY",
"ICLOUD_BACKUP_PUBLIC_KEY"
],
"fee_config": {
"currency": "usdc",
"payer_address": "YOUR_SMART_ACCOUNT_ADDRESS"
}
}'
```
Note that we:
* Keep the threshold at 2, meaning any two signers can approve transactions
* Include all existing signers in the update
* Add the new MPC recovery key with CAN\_VOTE permission to ensure that the user can always access their funds
* Include transaction\_signers for the update operation
* Configure the fee to be paid in USDC by the smart account
When submitting this update transaction, remember that:
* The transaction needs to be signed by the specified transaction\_signers
* Since we're using the smart account as the fee payer, no additional fee payer signature is needed
* If using an external fee payer, that account would need to sign the transaction
Learn more about [transaction fees](/squads-api/transaction-fees) and how they work.
Verify your Smart Account setup and check the balances using the GET /v1/smart-accounts/{smart_account_address} endpoint.
```bash theme={null}
curl -X GET https//developer-api.squads.so/v1/smart-accounts/{smart_account_address} \
-H "Authorization: Bearer YOUR_API_KEY" \
-H "x-squads-network: mainnet"
```
Now let's create and submit a USDC transfer transaction. We'll use the transaction endpoint to submit the transfer.
```javascript theme={null}
// Import required dependencies
import { Connection, PublicKey, Transaction } from '@solana/web3.js';
import { Token, TOKEN_PROGRAM_ID } from '@solana/spl-token';
// Initialize connection
const connection = new Connection('https//developer-api.mainnet-beta.solana.com');
// USDC mint address on mainnet
const USDC_MINT = new PublicKey('EPjFWdd5AufqSSqeM2qN1xzybapC8G4wEGGkZwyTDt1v');
const smartAccountAddress = new PublicKey('YOUR_SMART_ACCOUNT_ADDRESS');
const recipientAddress = new PublicKey('RECIPIENT_ADDRESS');
const amount = 100 * 1e6; // 100 USDC (6 decimals)
// Get the token accounts
const sourceTokenAccount = await Token.getAssociatedTokenAddress(
TOKEN_PROGRAM_ID,
USDC_MINT,
smartAccountAddress
);
const destinationTokenAccount = await Token.getAssociatedTokenAddress(
TOKEN_PROGRAM_ID,
USDC_MINT,
recipientAddress
);
// Create the transfer instruction
const transferInstruction = Token.createTransferInstruction(
TOKEN_PROGRAM_ID,
USDC_MINT,
sourceTokenAccount,
destinationTokenAccount,
smartAccountAddress,
[],
amount
);
// Create and serialize the transaction
const transaction = new Transaction().add(transferInstruction);
const serializedTransaction = transaction.serialize().toString('base64');
// Submit the transaction through our API
const response = await fetch(
`https//developer-api.squads.so/v1/smart-accounts/${smartAccountAddress}/transactions`,
{
method: 'POST',
headers: {
'Authorization': 'Bearer YOUR_API_KEY',
'x-squads-network': 'mainnet',
'Content-Type': 'application/json'
},
body: JSON.stringify({
transaction: serializedTransaction,
transaction_signers: [
'ON_DEVICE_PUBLIC_KEY',
'ICLOUD_BACKUP_PUBLIC_KEY'
],
fee_config: {
currency: 'usdc',
payer_address: smartAccountAddress.toString()
}
})
}
);
const data = await response.json();
// The response will contain the prepared transaction that needs to be signed
const { transaction: preparedTransaction } = data;
```
This example shows how to:
1. Create a USDC transfer instruction using `@solana/spl-token`
2. Build and serialize the transaction
3. Get gas abstraction for the transaction and prepare the transaction for submission using the [prepare transaction](/squads-api/api-reference/v1/endpoint/smart-accounts/transactions) endpoint
4. Handle the response which contains the prepared transaction
After receiving the prepared transaction from the API (which includes all necessary fee configurations), you just need to:
* Sign it with the required signers (matching the `transaction_signers` you specified)
* If using an external fee payer (not the smart account), sign with the fee payer
* Submit the signed transaction to the Solana network
* Monitor the transaction status until it's confirmed
Remember to:
* Handle errors appropriately
* Implement proper key management for signing
* Consider [adding spending limits](/squads-api/api-reference/v1/policies#spending-limits) for additional security
## Next Steps
Once your Smart Account is set up, you can:
* Implement transaction signing using the [transactions endpoint](/squads-api/api-reference/v1/endpoint/smart-accounts/transactions)
* Add spending limits using the [policies endpoints](/squads-api/api-reference/v1/policies)
* Monitor balances using the [get-balances endpoint](/squads-api/api-reference/v1/endpoint/smart-accounts/get-balances)