
The Problem
- EOA wallets have a high barrier to entry
- Users need to store and protect secret recovery phrases
- Loose your wallet = lose your funds
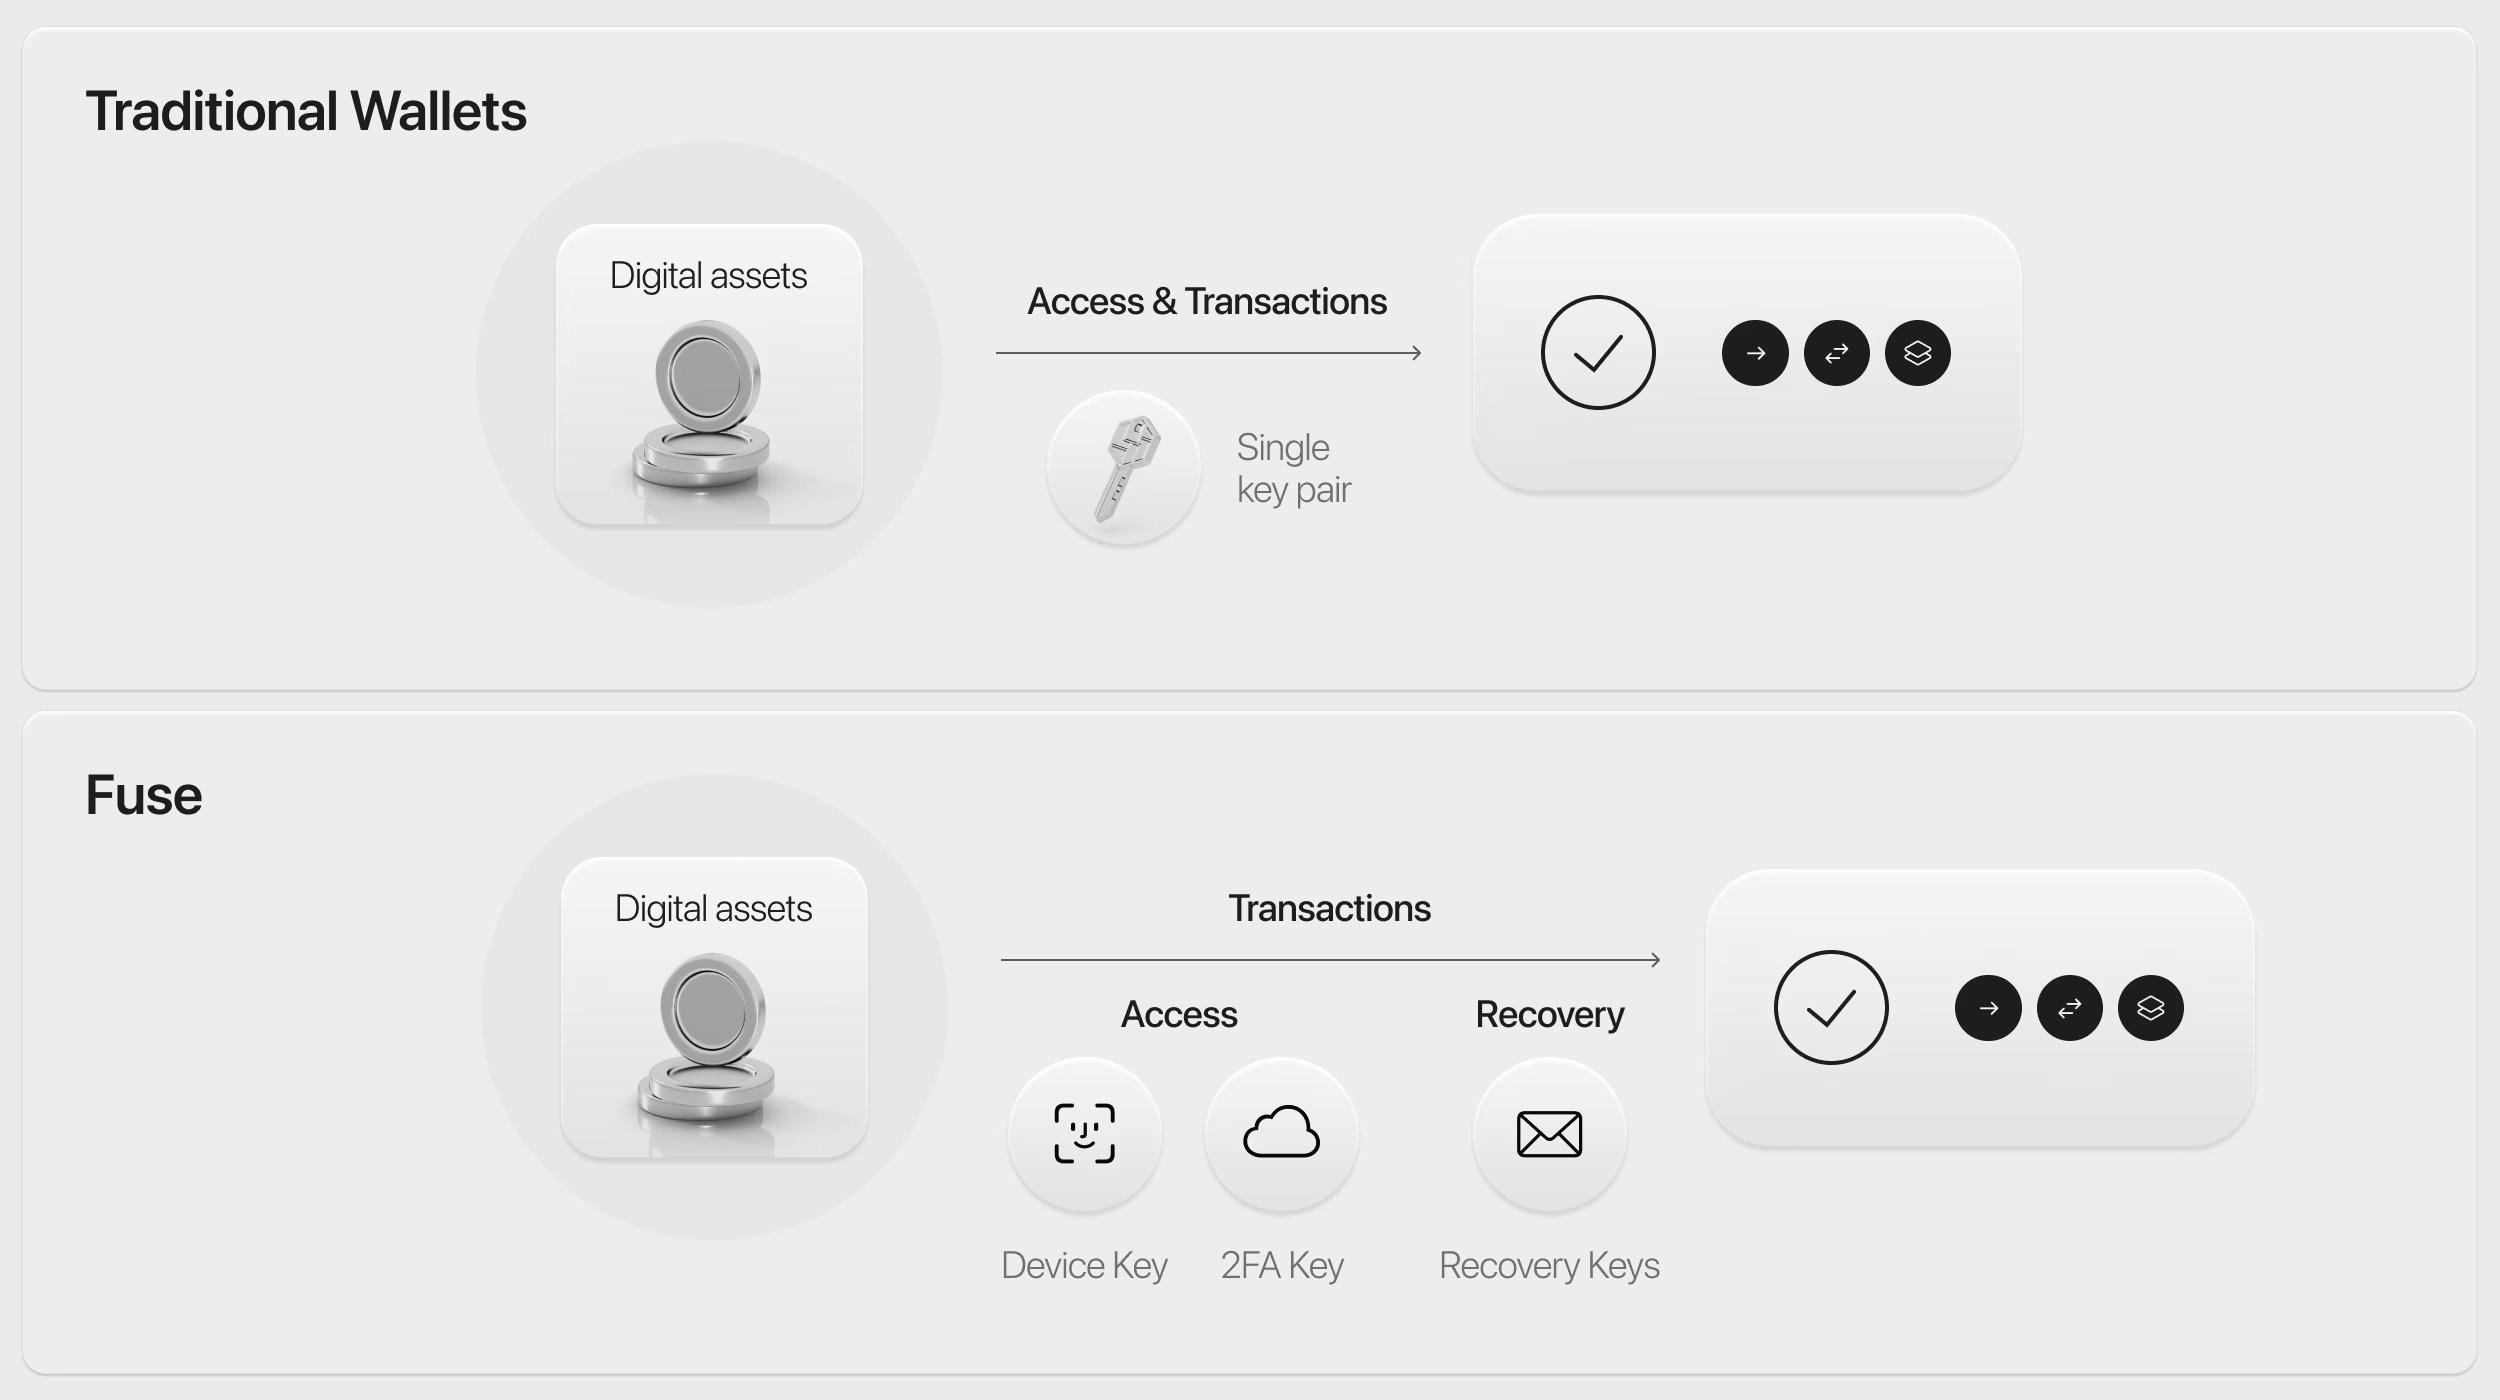
The Solution
- Smart Accounts with multiple signers removes the single point of failure of secret recovery prhases and increases security
- Smart Accounts add programmable capabilities to wallets to retain security but allow for more complex user flows
The Implementation
Onboarding
In order to remove the barrrier to entry, Fuse creates multiple keys on setup thus removing the reliance on a secret recovery phrase. By setting the threshold to 2, Fuse ensures that the user can always access their funds even if the device is lost.Signer Setup
- On-device key
- iCloud backup key
- Recovery MPC key
Security Considerations
- The threshold of 2 ensures that no single signer can compromise the wallet
- Users can recover their wallet using any combination of two signers
- The MPC recovery key adds an additional layer of security while maintaining user-friendly recovery options
Implementation Guide
Here’s how to implement a wallet similar to Fuse using Squads API v1 endpoints: In this guide, we’ll:- Create a Smart Account with initial signers (on-device and iCloud backup keys)
- Add a recovery MPC key as a third signer for enhanced security
- Verify the account setup and check balances
- Create and submit a USDC transfer transaction
Create Smart Account with Initial Signers
First, create a new Smart Account with the on-device key and iCloud backup key using the create smart account endpoint.The returned
smart_account_address is your new wallet address. Save this for sending funds to the wallet.Add Recovery MPC Key
Add the MPC recovery key as a third signer using the update smart account endpoint. This provides an additional layer of security and recovery options.Note that we:
- Keep the threshold at 2, meaning any two signers can approve transactions
- Include all existing signers in the update
- Add the new MPC recovery key with CAN_VOTE permission to ensure that the user can always access their funds
- Include transaction_signers for the update operation
- Configure the fee to be paid in USDC by the smart account
- The transaction needs to be signed by the specified transaction_signers
- Since we’re using the smart account as the fee payer, no additional fee payer signature is needed
- If using an external fee payer, that account would need to sign the transaction
Verify Account Setup
Verify your Smart Account setup and check the balances using the GET /v1/smart-accounts/ endpoint.
Create your first transfer with your smart account
Now let’s create and submit a USDC transfer transaction. We’ll use the transaction endpoint to submit the transfer.This example shows how to:
- Create a USDC transfer instruction using
@solana/spl-token - Build and serialize the transaction
- Get gas abstraction for the transaction and prepare the transaction for submission using the prepare transaction endpoint
- Handle the response which contains the prepared transaction
- Sign it with the required signers (matching the
transaction_signersyou specified) - If using an external fee payer (not the smart account), sign with the fee payer
- Submit the signed transaction to the Solana network
- Monitor the transaction status until it’s confirmed
- Handle errors appropriately
- Implement proper key management for signing
- Consider adding spending limits for additional security
Next Steps
Once your Smart Account is set up, you can:- Implement transaction signing using the transactions endpoint
- Add spending limits using the policies endpoints
- Monitor balances using the get-balances endpoint